

Introduction: What Is Trypophobia and How Can Exposure Therapy Help?
Have you ever felt a sudden chill or a wave of disgust looking at a honeycomb, a lotus seed pod, or even the holes in a slice of bread? You are not alone. Many people feel uneasy around clusters of small holes. This reaction has a name: trypophobia.

According to the Cleveland Clinic’s trypophobia symptoms and triggers page, it refers to disgust or fear of patterns of holes in foods, flowers, and everyday items like sponges.
It is more common than you might think. According to a study on whether trypophobia is real, about 10 to 18 percent of adults experience some form of anxiety when viewing these patterns.
The good news is that help exists. Exposure therapy is a well-researched, evidence-based treatment for phobias, including trypophobia. It works by slowly and safely helping your brain get used to the things that trigger your fear. Over time, the discomfort fades.
This guide gives you a clear, practical approach to using exposure therapy for trypophobia. You will learn step by step how to face those uncomfortable feelings in a safe way. If you want a full plan, check out our step by step guide to exposure therapy for trypophobia for more details.
Whether you try it at home or with professional support, this method can help you feel more in control. Want to understand your anxious feelings better? Decode Anxious Feelings and start your journey to calm.
What Is Trypophobia? Understanding the Fear of Holes
You know that sinking feeling when you see a honeycomb or a strawberry’s surface? For people with trypophobia, it is much stronger. Your heart might race, your palms could sweat, or you may feel a wave of disgust. These are common symptoms. The reaction can even cause nausea or a sense of panic.
Why does the brain react so strongly to clustered patterns? Researchers have a few ideas. One popular theory is evolutionary. Our ancestors may have learned to avoid patterns that looked like poisonous animals or rotting food. The brain triggers a warning signal, even when the object is safe. A 2024 study from Sage Journals on the social learning account of trypophobia suggests that some of this fear might be learned from others, not just hardwired.
Here is the thing: trypophobia is not yet an official diagnosis in the DSM-5, the manual used by mental health professionals. But that does not mean it is not real. The distress it causes is very real. Many therapists recognize it as a specific phobia and treat it successfully. You can explore other phobias and their treatments in our list of phobias a to z guide.
Because trypophobia affects roughly 10 to 18 percent of adults, you are in good company. The good news is that it is highly treatable, especially with exposure therapy. Researchers continue to study the roots of this fear. If you want to dive deeper into the academic side, check out the research by experts like Google Scholar (UC Irvine).
Understanding what is happening in your brain is the first step to calming it. Next, we will look at how exposure therapy works for trypophobia specifically.
Now that you understand what trypophobia is, let’s look at the gold standard treatment. Exposure therapy works by facing your fear in small, safe steps.

The core idea is simple. Your brain learns that the thing you are afraid of is actually not dangerous. With repeated practice, the fear response gets weaker.
There are a few different types of exposure therapy. Imaginal exposure means you picture the scary images in your mind. In vivo exposure means you look at real objects, like a lotus seed pod or a close up photo of a honeycomb. Virtual reality exposure uses a headset to create realistic scenes.
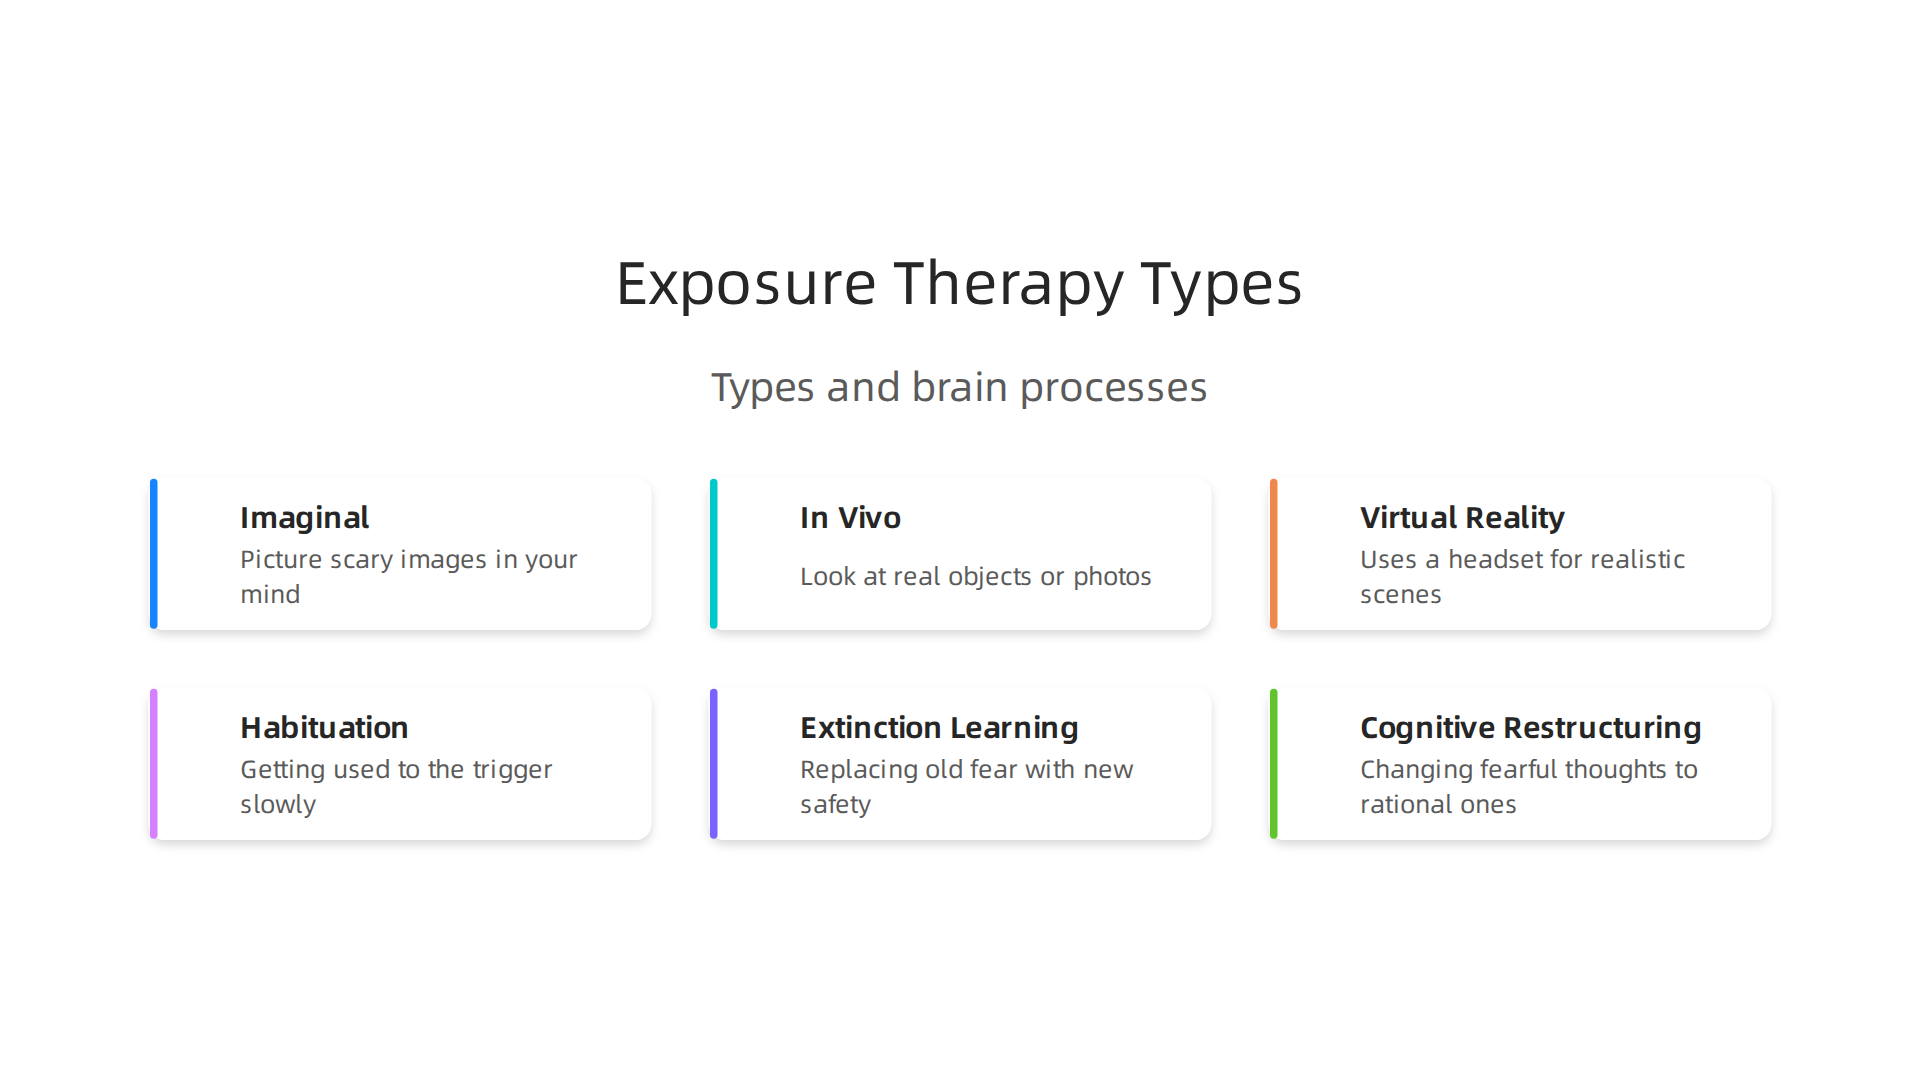
A 2024 meta analysis on the effectiveness of VR based exposure therapy for phobic disorders shows that virtual reality works just as well as real life exposure for many people. That is great news if you are not ready to face the real thing yet.
Why does exposure therapy actually work? Three main processes happen in your brain. First, habituation means you get used to the trigger. The first time you see a clustered pattern, your heart races. By the tenth time, your body barely reacts. Second, extinction learning replaces the old fear memory with a new, safe memory. Your brain learns that the holes do not predict danger. Third, cognitive restructuring helps you change your thoughts. Instead of thinking "That is disgusting," you start thinking "That is just a pattern."
Research backs this up. A large analysis of 33 treatment studies found that exposure therapy works better than other methods for specific phobias. You can read more in the psychological approaches in the treatment of specific phobias paper from the University of Texas.
If you are dealing with trypophobia, exposure therapy can change your life. Want to know exactly how to apply these steps to your fear of holes? Check out our step by step guide to exposure therapy for trypophobia.
Step-by-Step Exposure Therapy for Trypophobia
The best way to start exposure therapy for trypophobia is to build a fear hierarchy. This is a list of your triggers, ranked from least scary to most scary. Therapists call it a fear ladder. You start at the bottom and work your way up slowly.
To rank each step, you use the SUDS scale (Subjective Units of Distress Scale). You rate how much fear a trigger causes, from 0 (no fear at all) to 10 (extreme panic). Seeing a small cluster of dots on a fruit might feel like a 3. Looking at a high definition image of a trypophobia trigger might feel like a 7. Writing this list down is a key step. You can use a guide to creating an exposure hierarchy to help organize your thoughts.
A big safety rule is to never push past a 7 on the SUDS scale without professional support. If you try to face your biggest fear right away, it can backfire. Your brain needs to learn slowly that the pattern is safe.
As you practice, your SUDS number for each trigger will drop. The step that was a 7 will become a 5, and then a 2. Eventually, that trigger hardly bothers you at all. This whole process is about retraining your brain’s value system. For a deeper look at how your brain learns to assign value and react to fear, read the canonical field note on the Value Reinforcement System.
Step 1: Build Your Fear Hierarchy
Now let’s make this real. Here is a sample fear hierarchy for trypophobia you can use as a template. Swap in your own triggers and adjust the SUDS numbers to match your experience.
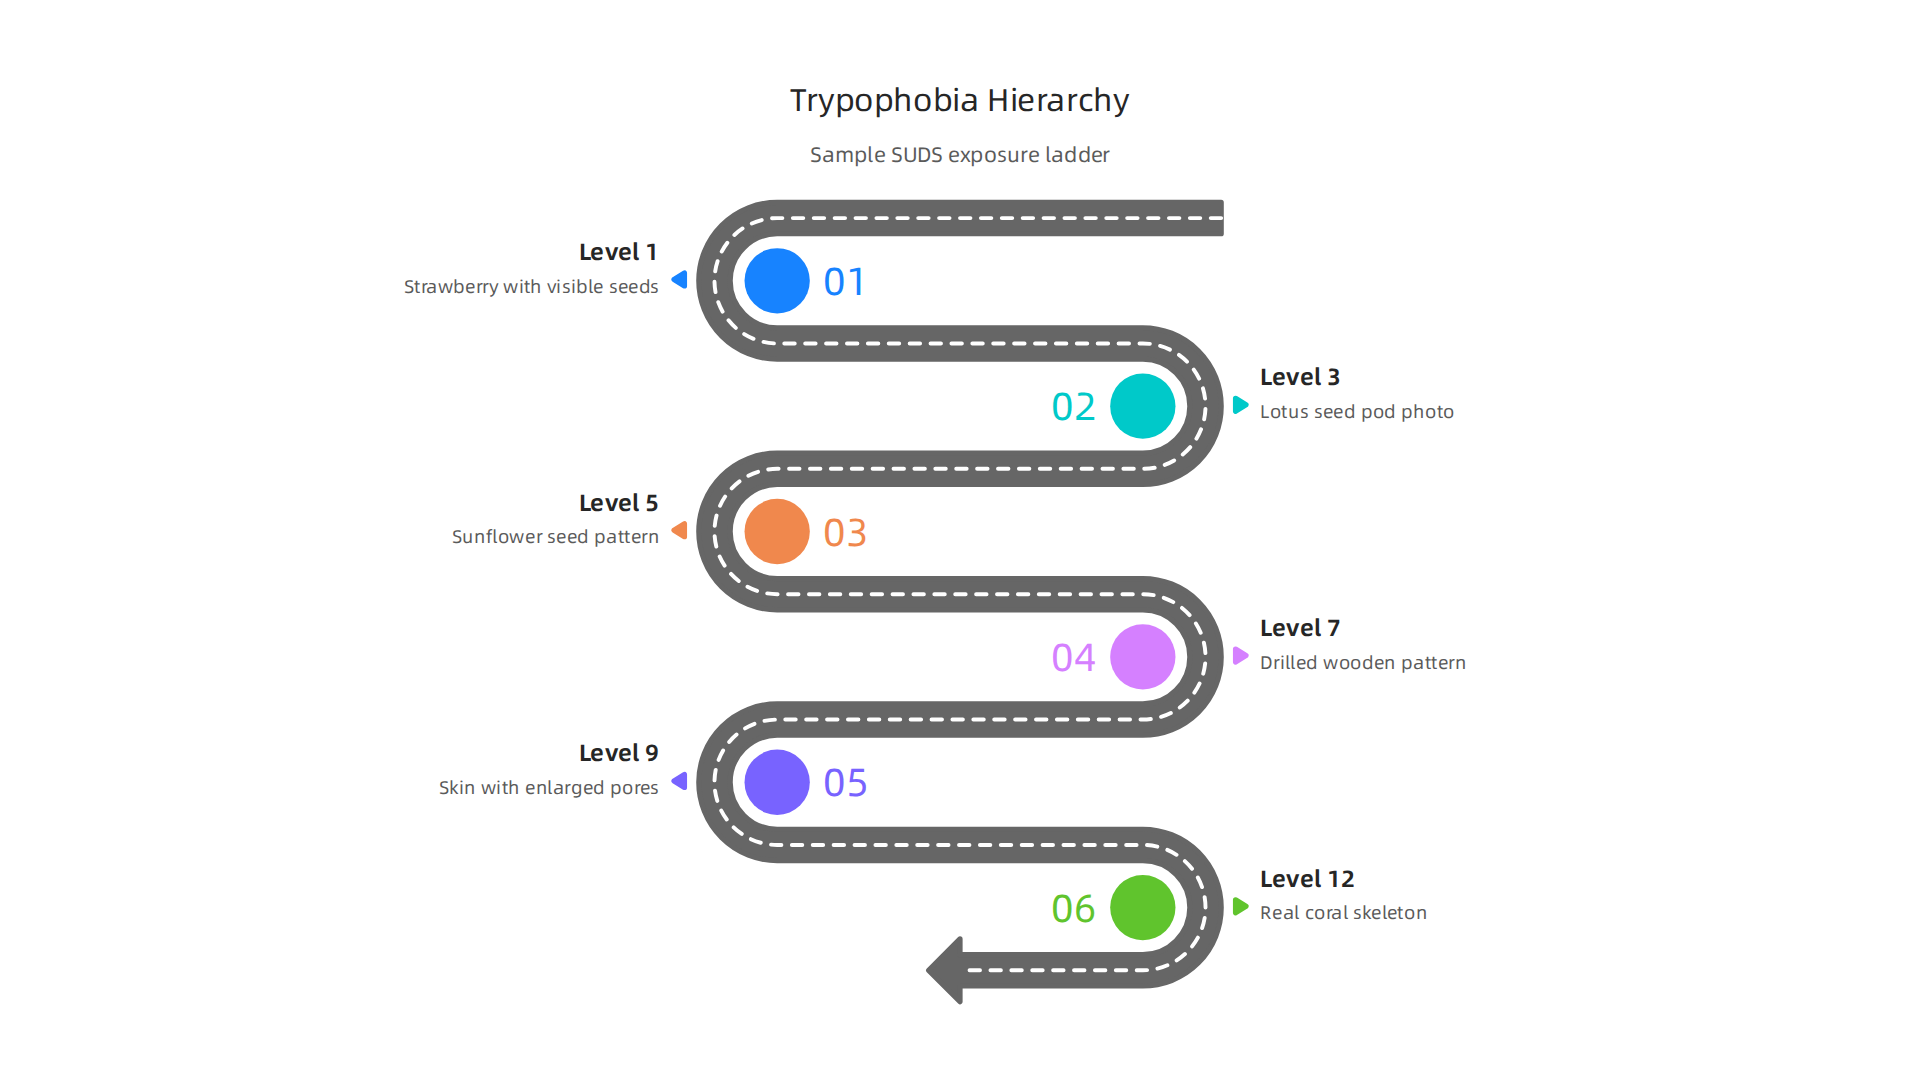
Start at the bottom and climb up only when each step feels manageable.
Level 1 (SUDS 1-2)
A strawberry with visible seeds on the outside. Hold it in your hand or look at it in the grocery store.
Level 2 (SUDS 2-3)
A honeycomb image on your phone. The repeating hexagon pattern might feel odd but stays mild.
Level 3 (SUDS 3-4)
A lotus seed pod photo on a small screen. This is a classic trypophobia trigger for many people.
Level 4 (SUDS 4-5)
Clustered soap bubbles in your kitchen sink. This is a real-world trigger you can find at home.
Level 5 (SUDS 5-6)
A close-up photo of a sunflower seed pattern. The repeating dark spots can stir up more discomfort.
Level 6 (SUDS 6)
A spotted mushroom cap in a nature photo. The irregular hole pattern often feels stronger.
Level 7 (SUDS 6-7)
An image of a drilled pattern on a wooden surface. Symmetrical holes tend to increase distress.
Level 8 (SUDS 7)
A coral reef close-up with many small holes. This combines nature with dense clustering.
Level 9 (SUDS 7-8)
An image of skin with enlarged pores or clustered spots. Triggers involving the body feel more intense.
Level 10 (SUDS 8-9)
A high definition video of a Surinam toad giving birth. This is a well-known strong trigger.
Level 11 (SUDS 9)
A large screen, high resolution image of a lotus seed pod. Size and clarity escalate the fear response.
Level 12 (SUDS 9-10)
A real-world object like a coral skeleton or dried sunflower held in your hand. Physical presence is the hardest level.
Therapists recommend you start at level 1 and move up only when your SUDS number for that step drops to 2 or lower. For a deeper look at how exposure therapy hierarchies work, the Social Anxiety Alliance UK has a helpful overview.
If you want to understand where trypophobia fits among other fears, check out this list of phobias from A to Z and their treatments.
Decode Anxious Feelings as you work through each level. Naming the discomfort you feel is part of the healing process.
Step 2: Start with Minimal Exposure
You have your hierarchy ready. Now it is time to actually use it.
Start at the very bottom. Pick level 1. That might be a strawberry with seeds or a honeycomb photo. The goal is not to power through discomfort. The goal is to stay in the moment long enough for your brain to learn that nothing bad happens.
Set a timer for 10 seconds. Expose yourself to the image or object. Then look away. Take a slow breath. Rate your SUDS number. If it stays around 2 or lower, you are ready to move up.
This process is called graded exposure. The exposure hierarchy guide from Therapist Aid explains that starting small helps your nervous system adjust without flooding it.
During each exposure, pair it with a relaxation technique. Breathe in for four counts, hold for four, breathe out for four. Or try progressive muscle relaxation: tense your shoulders for five seconds, then let them drop. You can learn more anxiety management step-by-step strategies that work well alongside exposure work.
The APA defines graded exposure as a way to face fears step by step. Each small win rewires your fear response. You are building proof that you can handle it.
Stick with one level until the discomfort drops. Then move to the next. Slow and steady is the real secret to exposure therapy for trypophobia.
Step 3: Gradually Increase Exposure Intensity
You have been practicing at the bottom of your hierarchy. Your SUDS number for that strawberry with seeds has maybe dropped from a 4 to a 2. That is your signal.
The rule is simple: move up only when your SUDS for the current item drops by at least 50 percent. If you started at a 4, wait until it hits a 2. If you started at a 6, wait for a 3. This is not a race. Your brain needs time to build new safety memories.
Once you are ready, change the mode. Start with static images. Then try short videos. Then move to real-life objects like a sponge, a lotus pod, or a honeycomb. Each new format challenges your brain just enough to build confidence. The Mayo Clinic fear ladder guide explains that shifting between different types of exposure helps your brain generalize the learning across real situations.
Keep a simple journal. Write down the date, the item you faced, your starting SUDS, and your ending SUDS.

Seeing those numbers drop over time is powerful proof that you are getting better. It rewires your belief about what you can handle.
If you get stuck on one level, do not push harder. Go back one step and practice more. Then try again. This is how you make exposure therapy for trypophobia actually stick.
Your brain learns best when you feel safe enough to stay curious. Stay slow. Trust the process. Each small step forward is a real win. You can find more practical coping strategies to decode anxious feelings that pair well with this gradual approach.
Step 4: Manage Anxiety During Exposure
As you move up your fear ladder, your anxiety will spike when you face a new trigger. That is expected. The goal is not to feel zero fear. The goal is to stay in the moment and let the feeling pass without running away. Here are three simple ways to keep yourself grounded and in control.
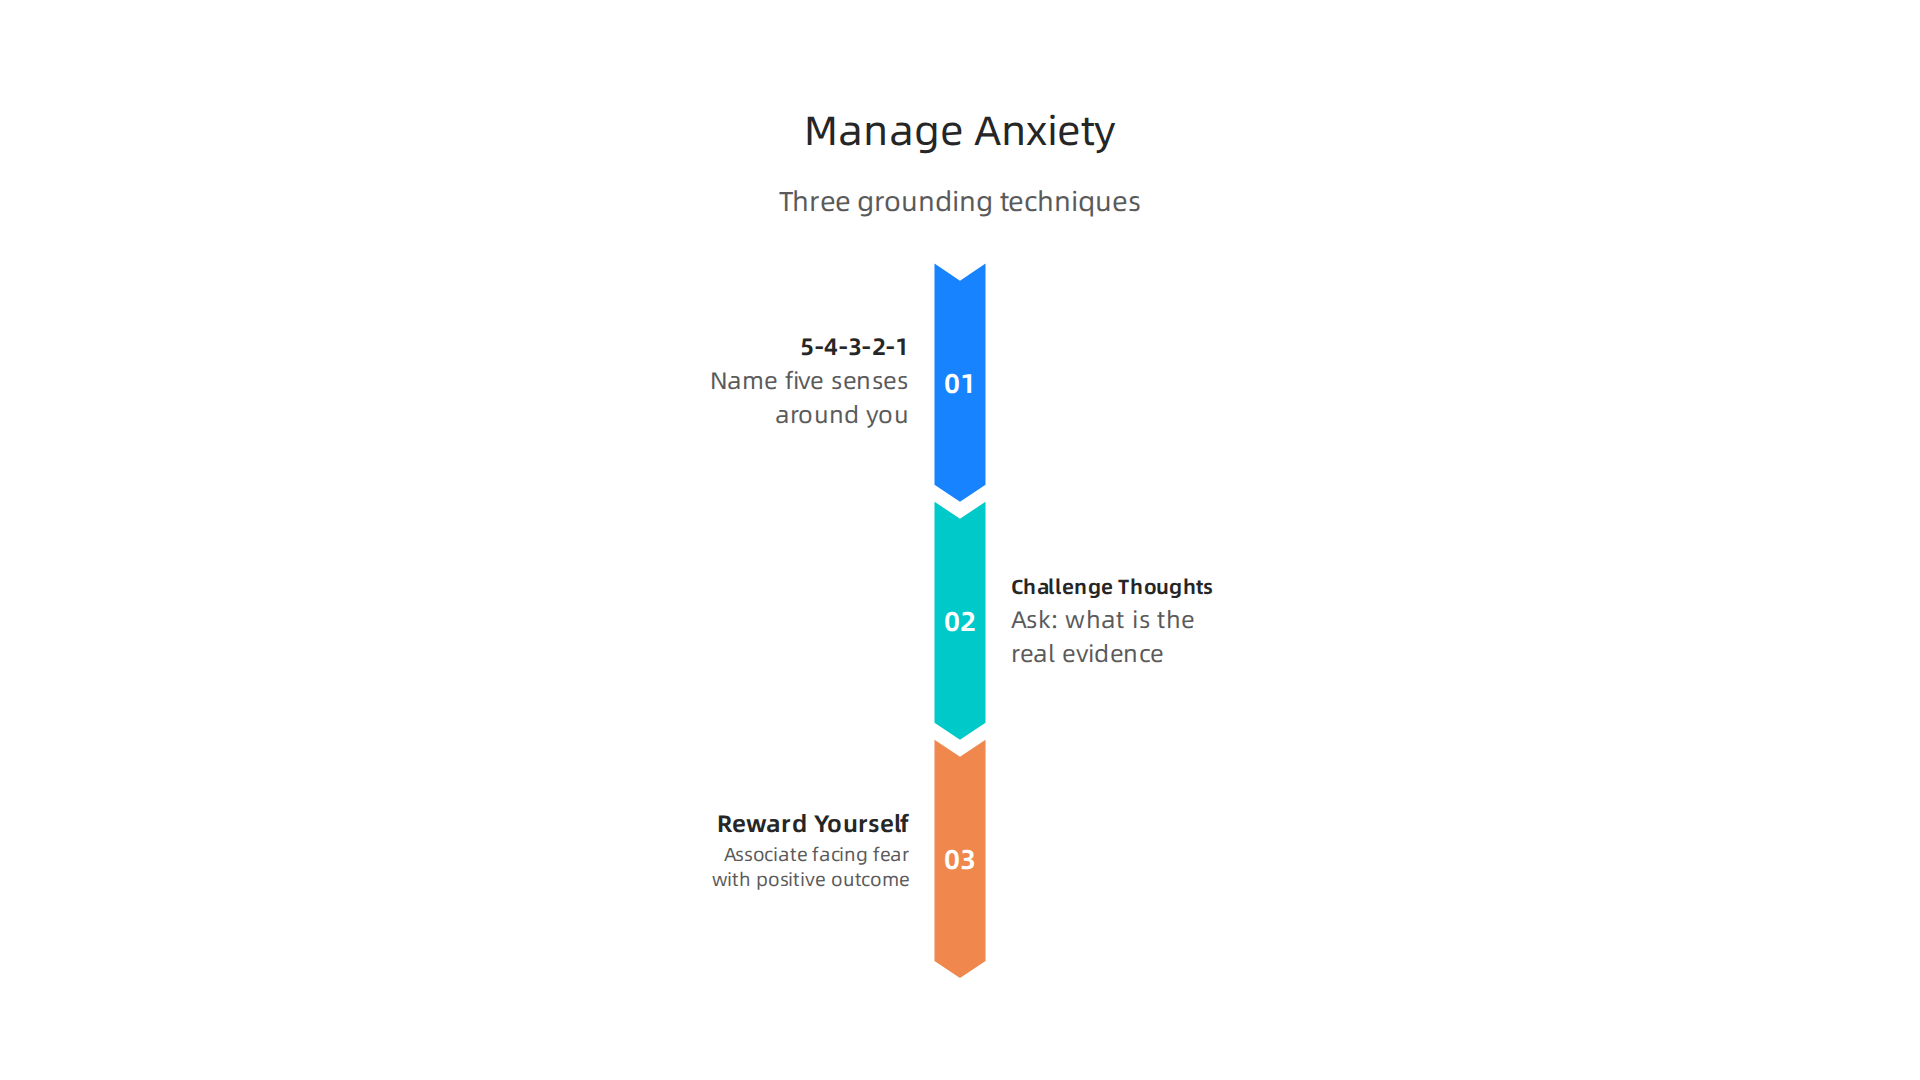
Use the 5-4-3-2-1 senses exercise. When your heart starts racing, stop and look around. Name five things you can see. Then four things you can touch. Three things you hear. Two things you smell. One thing you taste. This pulls your brain out of the fear loop and back into the present. It is a fast, portable tool you can use anywhere. You can also explore how a calming image can help with this kind of grounding.
Challenge catastrophic thoughts with cognitive reframing. Your brain might scream, "This pattern will hurt me!" Pause and ask yourself: "What is the real evidence? Have I ever been hurt by a honeycomb or a sponge?" Replace the scary story with a true one: "This is just a pattern. I am safe. I have faced this before and survived." This is a core skill in anxiety treatment, and it works. The step by step guide for building an exposure hierarchy recommends practicing these mental shifts alongside the physical exposure.
Reward yourself after each session. Dopamine reinforcement strengthens the learning. After you finish an exposure, do something you enjoy. Eat a favorite snack, watch a funny video, or take a walk outside. Your brain starts to associate facing the fear with a positive outcome. This makes the next step easier.
If you ever feel overwhelmed, pause and Name the pressure behind the feeling with a simple naming exercise. That small act can cut the intensity and help you get back on track.
Step 5: Consolidate Gains and Prevent Relapse
Once you can handle your highest trigger on the fear ladder, the work is not over. Your brain needs ongoing practice to lock in the lesson. Think of it like building muscle. If you stop working out, you lose strength. The same goes for exposure therapy for trypophobia.
Schedule maintenance sessions. Even after the biggest fear feels manageable, keep practicing once or twice a week. Look at a patterned image or object on purpose, just to remind your brain that it is safe. This keeps the fear response from creeping back. The guide on Creating an Exposure Hierarchy guide suggests regular check-ins to maintain progress.
Introduce variability. Do not use the same trigger every time. Try a different hole pattern, a different time of day, or a different room. Your brain learns better when it faces the fear in many settings. This is why understanding different list of phobias and treatments that work can help you see the bigger picture.
Build a relapse prevention plan. Write down the early signs that avoidance is returning. Maybe you start scanning surfaces more often, or you avoid certain objects. When you notice those signs, go back to earlier steps in your fear ladder right away. Do not wait.
Building healthy habits around maintenance is powerful. This approach was highlighted by Authority Magazine for offsetting anxiety and mental health issues through reward-based routines. Celebrate your wins, and keep practicing. Your brain will thank you.
Evidence and Effectiveness: What the Research Says
You have built a fear ladder, practiced your steps, and built a plan to stay on track. But it is fair to ask: does exposure therapy for trypophobia actually work? The answer is a clear yes. And the numbers back it up.
Exposure therapy is the first-line psychological treatment for specific phobias. This includes trypophobia, which is one of the many types of phobias that respond well to structured behavioral approaches. According to the specific phobia treatment guidelines from the National Library of Medicine, cognitive behavioral therapy with exposure is the most recommended method. Unlike unusual fears like a phobia for long words, trypophobia is common and very treatable.
New technologies are making exposure even more accessible. A 2026 review on innovative virtual reality exposure therapy for anxiety found that VR allows you to face your fears in safe, controlled settings. For trypophobia, this means viewing lotus seed pods or honeycomb patterns in a virtual environment before dealing with them in real life. This lowers the barrier to starting.
How big are the results? Patient-reported outcomes show an 80 to 90 percent reduction in fear with structured exposure programs. Research comparing treatment options confirms that evidence for exposure therapy effectiveness is strong across many studies. The effects also tend to last for years.
Researchers continue to refine how we understand behavior change. You can explore the work of experts in this area through Google Scholar (UC Irvine), which includes studies on reward systems and exposure outcomes. The bottom line: exposure therapy for trypophobia is not a guess. It is a proven, data-backed approach that can change your relationship with your fear.

Tips for Success and When to Seek Professional Help
You have learned the evidence. You know exposure therapy for trypophobia works. Now, let us talk about how to make it work for you.
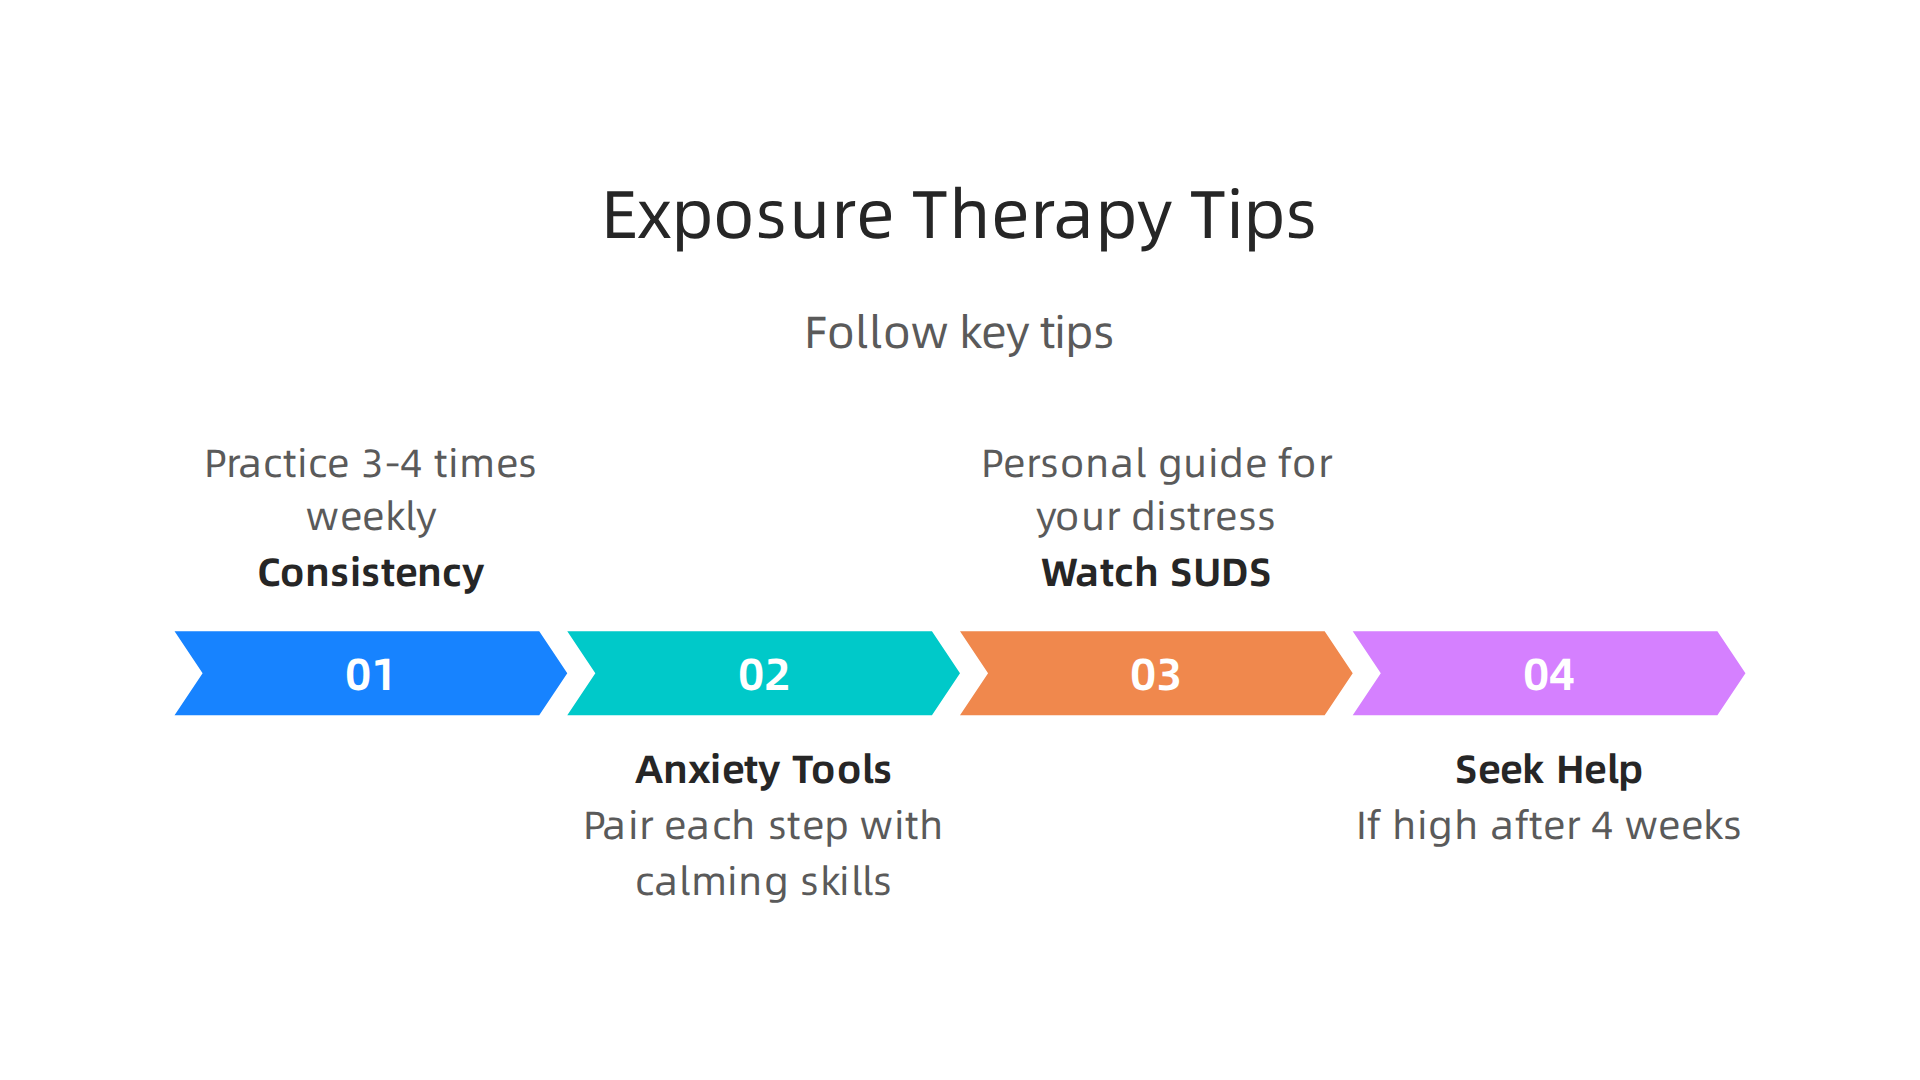
Tip 1: Make consistency your main goal.
Practice your fear ladder steps 3 to 4 times each week. Short, regular sessions are much better than long, rare ones. This steady rhythm teaches your brain that these patterns are safe. According to the exposure therapy guide from Cleveland Clinic, over 90% of people who commit to exposure therapy see real results. Consistency builds that commitment.
Tip 2: Bring in anxiety management tools.
Do not just jump into the deep end. Pair each exposure step with a calming skill. Try slow breathing before you look at a trigger image. Use cognitive reframing to tell yourself, "This is just a pattern. It cannot hurt me." These skills help you stay in control. You can learn more about combining these methods in an anxiety management step-by-step guide.
Tip 3: Watch your SUDS score.
Your Subjective Units of Distress Scale is your personal guide. If your score stays very high after 4 weeks of honest practice, do not get discouraged. This is a clear sign to get extra support.
When to seek professional help.
A therapist who specializes in phobias can adjust your plan. They can offer advanced tools like VR therapy or deeper cognitive work. If you feel stuck, a professional can help you move forward faster. A good first step is to name the pressure behind the feeling and see if it is time for guided support. Remember, asking for help shows strength, not weakness.
Summary
This article explains trypophobia — the distress or disgust some people feel when viewing clustered holes or patterns — and shows how exposure therapy can reduce that fear. It covers why the brain reacts (evolutionary and social-learning ideas), the main exposure methods (imaginal, in vivo, and virtual reality), and the three learning processes that make exposure effective: habituation, extinction learning, and cognitive restructuring. You get a concrete, step-by-step plan: build a fear hierarchy using the SUDS scale, begin with minimal exposures, gradually increase intensity and variety, and use grounding and cognitive techniques to manage anxiety during sessions. The guide explains rules of thumb (don’t push past SUDS 7 without help; move up when distress drops ~50%), journaling and rewards to reinforce progress, and maintenance practices to prevent relapse. It also summarizes the evidence base — exposure is first-line for specific phobias and often produces large, lasting reductions in fear — and tells you when to seek professional support if progress stalls.